SMART AM40 电源指示灯控制
前言
因为工控机里面部署了 Home Assistant 青龙面板 等系列服务,所以一般没有关机,但是 晚上睡觉的时候他那个电源指示灯就有点刺眼 影响睡眠,所以就想了想办法做了一个Web程序可以通过网页以及APP来控制灯光的开关,很方便控制。以下是我的系统信息可供大家参考
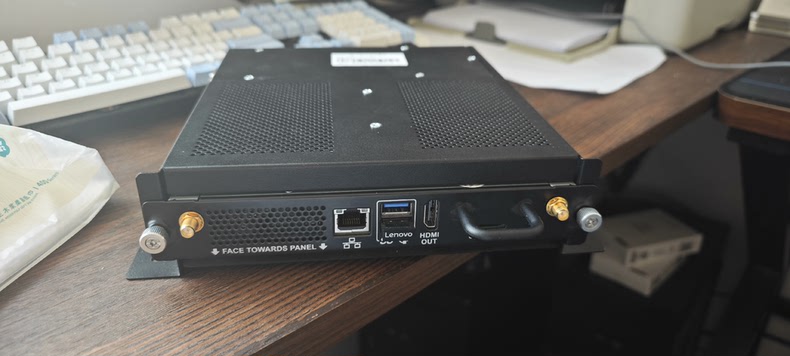
- 设备名称:SMART AM40(RK3399)
- 系统信息:Armbian 23.02(1panel)
简单方案(推荐)
点击下方链接跳转到 Github 查看我的新项目 AM40-LED-Control 使用一键部署方案 更快 更便捷
https://github.com/zhunse/AM40-LED-Control
手动方案(纯手工)
效果

教程
我这里采用的是1Panel 管理面板,其他的面板服务也可以
准备
1.输入以下命令 检查可用的 LED 控制接口
ls /sys/class/leds/2.像我这里就输出了以下信息 blue:power是一个蓝色的电源指示灯 mmc2::忽略
root@AM40:~# ls /sys/class/leds/
blue:power mmc2::3.这里可以输入以下命令 查看LED状态 输出 0 表示关闭,1 表示开启
cat /sys/class/leds/blue:power/brightness4.可以通过以下命令来手动控制灯光开关(测试一下)
# 打开 LED(亮)
echo 1 | sudo tee /sys/class/leds/blue:power/brightness

# 关闭 LED(灭)
echo 0 | sudo tee /sys/class/leds/blue:power/brightness开始
1.安装 Flask(Python Web 框架)
# 更新系统包
sudo apt update
sudo apt upgrade -y

# 安装Python3和pip
sudo apt install python3 python3-pip -y

# 安装Flask
pip3 install flask2.创建服务
我这是在1Panel 管理面板里面的 网站 创建了一个 反向代理 服务 IP:192.168.10.12:85 后端代理地址http://127.0.0.1:5000 在这个路径下创建文件
/opt/1panel/apps/openresty/openresty/www/sites/System-lighting/index
├── app.py                # Flask 后端
└── templates/
└── index.html # 前端页面3.创建后端文件app.py
from flask import Flask, request, jsonify, render_template
import os

app = Flask(__name__)
LED_PATH = "/sys/class/leds/blue:power"

@app.route('/')
def index():
    return render_template('index.html')

@app.route('/toggle', methods=['POST'])
def toggle():
    try:
        with open(f"{LED_PATH}/brightness", 'r+') as f:
            current = int(f.read())
            f.seek(0)
            f.write('0' if current else '1')
        return jsonify(success=True)
    except Exception as e:
        return jsonify(error=str(e)), 500

@app.route('/set_mode', methods=['POST'])
def set_mode():
    try:
        mode = request.json.get('mode')
        with open(f"{LED_PATH}/trigger", 'w') as f:
            f.write(mode)
        return jsonify(success=True)
    except Exception as e:
        return jsonify(error=str(e)), 500

@app.route('/status')
def status():
    try:
        with open(f"{LED_PATH}/brightness", 'r') as f:
            on = int(f.read()) == 1
        return jsonify(on=on)
    except Exception as e:
        return jsonify(error=str(e)), 500

if __name__ == '__main__':
app.run(host='0.0.0.0', port=5000)4.创建前端页面templates/index.html
<!DOCTYPE html>
<html>

<head>
    <title>AM40灯光控制</title>
    <meta name="viewport" content="width=device-width, initial-scale=1">
    <style>
        * {
            padding: 0px;
            margin: 0px;
        }

        :root {
            --primary-color: #4361ee;
            --success-color: #4cc9f0;
            --toggle-size-pc: 150px;
            --toggle-size-mobile: 150px;
        }

        body {
            font-family: 'Segoe UI', system-ui, sans-serif;
            margin: 0;
            padding: 20px;
            background-color: #f8f9fa;
            color: #333;
            min-height: 90vh;
            display: flex;
            justify-content: center;
            align-items: center;
        }

        .content {
            width: 50%;
            background: white;
            border-radius: 15px;
            padding: 30px 30px 100px 30px;
            box-sizing: border-box;
            display: flex;
            flex-direction: column;
            align-items: center;
            box-shadow: 0px 0px 25px #80808015;
        }

        h1 {
            margin: 0 0 30px 0;
            color: var(--primary-color);
            font-weight: 600;
            font-size: 1.8rem;
            align-self: flex-start;
        }

        .status {
            display: flex;
            align-items: center;
            justify-content: center;
            gap: 12px;
            margin-bottom: 30px;
            font-size: 1.2rem;
        }

        .status-indicator {
            width: 18px;
            height: 18px;
            border-radius: 50%;
            background: #ccc;
        }

        .status.on .status-indicator {
            background: var(--success-color);
            box-shadow: 0 0 12px var(--success-color);
        }

        .toggle-container {
            display: flex;
            justify-content: center;
            margin-bottom: 35px;
        }

        .toggle-btn {
            width: var(--toggle-size-pc);
            height: var(--toggle-size-pc);
            border-radius: 50%;
            border: none;
            background: var(--primary-color);
            color: white;
            font-size: 1.2rem;
            font-weight: bold;
            cursor: pointer;
            transition: all 0.3s;
            -webkit-tap-highlight-color: transparent;
        }

        .toggle-btn:hover {
            transform: scale(1.05);
            opacity: 0.9;
        }

        .toggle-btn:active {
            transform: scale(0.98);
        }

        .mode-select {
            width: 100%;
            max-width: 220px;
            padding: 14px 30px 14px 14px;
            border-radius: 8px;
            border: 1px solid #ddd;
            font-size: 1rem;
            background: white;
            margin: 0 auto;
            display: block;
            appearance: none;
            background-image: url("data:image/svg+xml;charset=UTF-8,%3csvg xmlns='http://www.w3.org/2000/svg' viewBox='0 0 24 24' fill='none' stroke='%234361ee' stroke-width='2' stroke-linecap='round' stroke-linejoin='round'%3e%3cpolyline points='6 9 12 15 18 9'%3e%3c/polyline%3e%3c/svg%3e");
            background-repeat: no-repeat;
            background-position: right 12px center;
            background-size: 16px;
        }

        @media (max-width: 768px) {
            .content {
                width: 100%;
                background: none;
                border: none;
                padding: 10px;
                box-shadow: none;
            }

            .toggle-btn {
                width: var(--toggle-size-mobile);
                height: var(--toggle-size-mobile);
                font-size: 1.1rem;
            }

            h1 {
                width: 100%;
                font-size: 1.6rem;
                text-align: center;
                margin: 0 0 150px 0;
            }

            .status {
                font-size: 1.3rem;
            }
        }
    </style>
</head>

<body>
    <div class="content">
        <h1>AM40灯光控制</h1>
        <div class="status" id="status">
            <div class="status-indicator"></div>
            <span>加载中...</span>
        </div>

        <div class="toggle-container">
            <button class="toggle-btn" id="toggleBtn">开关</button>
        </div>

        <select class="mode-select" id="modeSelect">
            <option value="none">手动模式</option>
            <option value="heartbeat">心跳模式</option>
        </select>
    </div>

    <script>
        const toggleBtn = document.getElementById('toggleBtn');
        const modeSelect = document.getElementById('modeSelect');
        const statusDisplay = document.getElementById('status');

        // 获取当前状态
        function updateStatus() {
            fetch('/status')
                .then(response => response.json())
                .then(data => {
                    const isOn = data.on;
                    statusDisplay.innerHTML = `
                        <div class="status-indicator"></div>
                        <span>状态: ${isOn ? '开启' : '关闭'}</span>
                    `;
                    statusDisplay.classList.toggle('on', isOn);
                    toggleBtn.textContent = isOn ? '关闭' : '开启';
                    toggleBtn.style.background = isOn ? 'var(--success-color)' : 'var(--primary-color)';
                });
        }

        // 切换开关
        toggleBtn.addEventListener('click', () => {
            fetch('/toggle', { method: 'POST' })
                .then(updateStatus);
        });

        // 切换模式
        modeSelect.addEventListener('change', (e) => {
            fetch('/set_mode', {
                method: 'POST',
                headers: { 'Content-Type': 'application/json' },
                body: JSON.stringify({ mode: e.target.value })
            }).then(updateStatus);
        });

        // 初始加载
        updateStatus();
    </script>
</body>

</html>5.解决权限问题
由于 /sys/class/leds/ 需要 sudo 权限,需配置 udev 规则:
# 创建规则文件
sudo tee /etc/udev/rules.d/99-leds.rules > /dev/null <<EOF
SUBSYSTEM=="leds", ACTION=="add", RUN+="/bin/chmod 0666 /sys/class/leds/%k/brightness /sys/class/leds/%k/trigger"
EOF

# 重新加载规则
sudo udevadm control --reload
sudo udevadm trigger(现在无需 sudo 即可直接控制 LED)
6.创建系统服务
在 /etc/systemd/system 路径下创建 led_control.service 文件 并写入以下代码
[Unit]
Description=LED Control Service
After=network.target

[Service]
User=root
WorkingDirectory=/opt/1panel/apps/openresty/openresty/www/sites/System-lighting/index
ExecStart=/usr/bin/python3 /opt/1panel/apps/openresty/openresty/www/sites/System-lighting/index/app.py
Restart=always

[Install]
WantedBy=multi-user.target
EOF启用并启动服务:
sudo systemctl enable led_control
sudo systemctl start led_control其他常用服务管理命令
# 1. 启用开机自启动
sudo systemctl enable led_control
# 作用:设置服务随系统启动自动运行(创建符号链接到开机启动目录)

# 2. 禁用开机自启动
sudo systemctl disable led_control
# 作用:取消服务的开机自启动(但不会停止当前运行的服务)

# 3. 启动服务
sudo systemctl start led_control
# 作用:立即启动服务(如果已运行会报错)

# 4. 停止服务
sudo systemctl stop led_control
# 作用:立即停止正在运行的服务

# 5. 重启服务
sudo systemctl restart led_control
# 作用:先停止再启动服务(适用于修改配置后重新加载)

# 6. 查看服务状态
sudo systemctl status led_control
# 作用:显示服务运行状态、PID、内存占用和最近日志

# 7. 重载服务配置
sudo systemctl daemon-reload
# 作用:重新加载所有service文件(修改.service文件后必须执行)完成
现在可以在浏览器输入: http://<设备IP>:5000 或者使用反向代理端口 http://<设备IP>:85 访问Web控制面板(需要在 SMART AM40 同一网络下
控制软件
这里用 5+APP 做了一个控制软件
https://zhuns.lanzoub.com/iWorV2ynvv2j
密码:0000
由于蓝奏云的限制 下载后把后缀的 .7z 删掉后安装软件
软件很简单 安装好后 配置好 局域网地址 和 远程地址 就可以使用了,需要注意的是都要加上 http:// 或者 https:// 协议,远程地址没有可以随便填写。远程地址主要就是在没有连接 SMART AM40 下同网络(WiFi)的时候使用,我这里使用的是一个内网穿透服务,监听本地的 5000 端口实现远程控制吗,会有一点延迟,但是方便。
其他信息
软件有个规则 先尝试 局域网连接 如果在5秒内没有连接上 就自动跳转到 远程连接 右上角可以查看当前状态 考虑到DHCP动态分配原因 右上角设置可以修改地址。